Archive for the ‘Uncategorized’ Category

Here is a quickie video of how I deal with the leaking fuel shut off in my Model A Ford. I actually tried to remove the original one about 10 years ago and had no luck. Instead of worrying about it, I rely on a secondary shut off. Here is a photo and a video.

Midtown Abbey Scramble

Posted: October 2, 2019 in Uncategorized

IMG_8024

The call comes in late Thursday.  The voice on the phone asked, “Do you still have your 1929 Model A?”  Of course I say “yes” which receives a rapid “Is it available for a shoot on Tuesday?” Of course I say “yes” which receives a “let me show some photos of the car to the producer and see if it works for them.” I warn them that the car looks great at 25 feet but isn’t a show car.  I get a call on Friday letting me know that my car is booked for a Downton Abbey related thing. What is that thing?  I have no clue.  I just know that the car is needed in Midtown by the Essex House on Tuesday. I was going to drive it to the shoot but decided that I would just let them flatbed it as I have been so busy and as flat bedding a Model A typically gets you where you want quicker.  If you know me, when it comes to the car I like to be prepared.

Here is where the fun begins.

With ONLY the weekend ahead of me (and most of that time already planned for other things), there are now car-things to do. It will be tight, but I should be able to get everything done if I get minimal sleep and nothing goes wrong (Yes, this is foreshadowing)

  • Clean the car (it is dirty),
  • Get gas,
  • Fix the split upholstery (front seat – backrest),
  • Patch and touchup paint (currently painted with primer), and
  • Do my already overbooked plans for the weekend.

On Friday I attempted to start dealing with the split upholstery.  I mean, can you really show up to a professional gig with a car that has seats like this?

IMG_8018

I can’t figure out how to sew this all back up and no one seems to have any matching materials. I decided that I can try to address this Saturday or Sunday. I am definitely not using black duct tape — but don’t think that it didn’t cross my mind.

The car is old and the existing paint is flaking in several spots.  I decided to paint to the primer patched area of the car with a foam roller. I figure this takes the most time because it will have to dry. It is time for a full car repaint but that is going to be the subject of many future posts. Now I need to figure out how to use incorrectly matched paint I have from years ago to cover up the primer patch I have on the back of the car. I started and moved the car before doing this.  It drove beautifully. The paint went on, dried its “off-color” but was better than the primer patch.  I did a few other small touchups.

I had Saturday plans on Long Island, so Saturday was really a dead day in terms of getting things done. It was however a good day to get a little gas for the car. I drove the car to get some gas.  It drove beautifully.  I made some calls about upholstery.  No luck.

On Sunday I worked in the morning with a client and then rushed home to drive to the detailer.  He did a nice job cleaning the car. It drove beautifully.  I made some calls about upholstery.  No luck.

On Monday I had to work but also new I had to deal with the upholstery.  I my mother suggested a little hidden fabric place that is only a few miles away.  I called and they told me that they have the material. The photo here is of the backrest.  Not for nothing, but if the gig has me showing up and transporting the cast of Downton Abbey, I can’t have the backrest split.  I drive the car to the fabric place and picked up a PERFECTLY matching material which I would later tack onto the seat to cover the old seat. It looks like a toddler was doing upholstery work, but all I needed was a patch.  I can get away with this!  Just need to tuck the fabric a little better and I am fine.

IMG_8019

IMG_8020

I also then decided to lightly sand the paint patch and put some wheel polish on it.  This didn’t look great but looked good enough. The key was using the wheel polish to cover the finish from the roller.   Again, the car drove beautifully.

I bet you can get how the day started on Tuesday when it was time to load the car onto a trailer.  I get a call 10 minutes before the flatbed driver arrives and the car just won’t start.  The battery is acting dead.  The scramble began to try to start the car.  The flat bed driver shows up. I don’t have a jumper box, but ran around the block to borrow one from a friend who owns a garage.   He only had a 12 volt one – which wasn’t charged… but what the hell.  I take it and then attempt to jump the car.  Something didn’t smell right when I did it. Oh, I reversed polarity for a fraction of a second. A stock Model A is a negative ground car – which is the opposite of what most people would expect.  With the polarity correct I started the car and DAMN the starter revved the engine like it never has revved before.  When you use 12 volts to run a 6 volt starter, you get that thing to hummm!

The car was running.  BUT NOW THE AMMETER WON’T go positive.   Ok, so I can’t charge the car if the generator isn’t giving a positive charge.  Here is how I trouble shot this: 1) check the connections with the generator and the cut out.  They seem to be good, 2) use a heavy cable (I couldn’t find a smaller wire) to bypass the cut out – this “jump” should remove the cut out and enable the generator to provide charge, 3) use an meter and read low charge on the battery, 4) try not to show panic as the driver is waiting and we are running late.  Ok, now I am convinced I either have a bad cut out or bad generator.  I check some other connections and then realize that we have to load the car up if we are going to make it on time.  I know I can jumpstart the car so we jump it and load the car onto the flatbed.  We do just that.

In route to the city I make calls to a few local model A gurus and no one has any solutions – excepting to swap out my cut out and/or generator.  I have a non-functional back up generator and can’t find my back up cut out.  We plug in the “dead” 12-volt jumper box that the garage lent me and basically I spent the trip trying to figure things out.

We make it to the shot at the Essex House with about 30 minutes to spare (we planned for about 1 hour).  I get the car started and decide that I am going to try to trouble-shoot again.  I find a length of wire I keep in the car and again jump the cut-out.  NOW THE AMMETER STARTS TO SHOW A CHARGE!  So, what happened?  I probably had a stuck cut out that was now loose or had to repolarize the generator.  Regardless, it works.  I figure If I let the car run for 30 minutes at high idle, it would charge the battery.   Regardless, I was NOT going to turn off the car (good thing I put in some gas).  I let it run for 30 minutes while NYC shows the car some love.  The producer and purchaser for ABC come and say hello and get in on the fun as well.  I happened to dress in a suit knowing that I may end up in the shoot.  You can’t imagine how many people approach you to tell you about family Model As and their memories as children.  Tom Hiddleston’s personal assistant was one of those people as he is staying at Essex House. I got to meet her and his dog.  It would have been great if “Loki” appeared for the shoot, but he didn’t. I think every doorman and manager at the Essex House posted photos of them sitting in the car.  

My wife is working around the block.  She calls and is going to rush over with a battery charger from a local Home Depot if I need.  I tell her that I think the car is going to be OK and not to worry.  She is great.

The talent shows up.  It is Sarah Haines of ABC’s GMA Strahan Sara and Keke show.  She seemed lovely and was dressed in period appropriate attire.  As a sidenote, my car is a 1929 Ford.  Downton Abbey takes place in 1927 — but hey, it’s close enough — they had this body type released in 1927/1928.  I am then told that the gig is a bit she is using as a lead up to the Downton Abbey movie release and her interviewing the cast and that I am in the shoot.  They did about 5 or 6 takes.  I basically had to back up the car 20 feet and then roll it forward.   One of the  cast members walked by while we were filming.

Here is what ABC did.  The Model A shows up at around the 55 second mark. Strahan expresses his delight with the car at the end of the segment.

Without getting too much into everything, I finally get home after the successful shoot (see videos) and then end up replacing the battery which has a dead cell – only giving 4.3 volts instead of 6 volts.

IMG_8029[1]

Greg (an automotive upholstery expert who works with classic cars) is scheduled to  redo my lackluster upholstery job in Mid October.

I’m hoping the car is picked up for more shoots/work soon.  It would be awesome to have more excuses to continue restoring it.  I am now considering what an appropriate timeline will be to repaint the entire car.

IMG_6952[1]

Thank you to the people of the Thruway Authority and Tee Zee Constructors. They have been absolutely wonderful…. not just in helping with the coordination of my driving across the bridge, but in all the work they have done on the bridge and for the community.

https://twitter.com/NewNYBridge/status/916644250279923713/photo/1?ref_src=twsrc%5Etfw&ref_url=https%3A%2F%2Ftwitter.com%2Fnewnybridge

https://twitter.com/CaruchaLMeuse/status/916526418980458496/video/1

https://twitter.com/NewNYBridge/status/916483607774056448

The old TZ Bridge was designed to last for 50 years and I suspect was never anticipated to accommodate the 130,000+ daily crossings that has punished its infrastructure. If you know the bridge, you know it really has that 50s era highly functional erector set feel.  I am certain it has seen more than its shares of Model As.  For those who followed my road trips a few years ago, you might remember the excitement I had when I first crossed the bridge to start a drive to Boston and the thrill that I had when I crossed it on the way back home.  The old bridge an essential part of Rockland County.

Aside from being more functional, the new bridge is much more elegant. The patterns of the cables are beautiful and the chamfered towers blend well into the Hudson River valley. The new bridge will have pedestrian walkways, a bike path, more lanes, etc.  Check it out at http://www.newnybridge.com/about/

Let’s talk about the car…. The Phaeton did great. In retrospect, I should have adjusted the generator for night driving — but that is just my paranoia for draining the battery. Aside from that the car started beautifully and the engine sounded great.

Folks have been asking, “how did you get to be the last car?” My official response, “I got lucky”.   My unofficial response, “I emailed a lot of people, spoke to more, emailed more, offered up rides, was respectful and genuine with my requests and got lucky”.  I probably should answer, “I’ve been stuck on the side of the thruway in the Model A enough time that I figured that they wouldn’t even notice me there anymore”.

Regardless….. My Model A was the LAST CAR OVER THE TAPPAN ZEE BRIDGE!  How awesome is that!

A Bridge Not Too Far

Posted: October 6, 2017 in Uncategorized

Bridge Attempt!IMG_7738

Yes, the Phaeton is back on the road and feeling much better. After a few years of effectively being a large paperweight, the engine/transmission are now getting along beautifully (they weren’t) and the car has been test driven on a few short adventures.

October 6th is slated to be the night when the old span of the TZ Bridge is closed for good.  This is the bridge that connects my hometown to “the other side of the Hudson”.  This evening, Kobi, Noah, and Gary Holmgren as well as I will be stationing at an undisclosed location and will attempt to be the last car to drive the old span. Sure, there is also the chance that we will be the last car that needs to be pushed over the old bridge, but that is ok too.  As I figure, why not go for it anyway?

A few things:

  • SAFETY FIRST. This adventure CANNOT be done in any way that would interfere with the construction and safety folks who have been doing such a great job. What they are doing is important. What I am attempting is a novelty. Effectively, what they say goes.
  • I’ve spoken with the Thruway Authority. They have stated that they cannot assist me in this adventure; however, did provide me with some insights as to the staging of the bridge closure and loved that I was making the attempt. If you haven’t already, please check out their website. http://www.newnybridge.com/   While I was really hopeful that they would “hook me up” on the side of the road, they have taken the highly appropriate, “can’t play favorites” approach. Again, what they say goes.
  • The Model A is old! If you happen to be driving near us on the attempt, please give us some room. The car meets the safety standards of 1929 but does not have the braking power of modern cars.
  • Lights…. I’ve got them… but again 1929 lighting standards were not quite up to today’s standards. Turn signals…. Yes, I have an arm and can signal which way I am turning… no, I don’t have signal lights to help me do this.

The media:

  • Journal News’s Robert Brum was the first to hear of my planned attempt. He and Seth Harrison met with me on the 5th to do a test run across the bridge. Brum was writing a column about his favorite times with the bridge…. He has a new one. Seth Harris shot some video for an online segment:

http://www.lohud.com/story/news/local/2017/10/05/tappan-zee-bridge-29-ford-last-cross/726732001/

http://www.lohud.com/videos/news/local/2017/10/05/video-rockland-resident-hopes-last-driver-cross-tappan-zee-bridge/106337096/

  • VIOS news interviewed me on the morning of 10/6. I don’t have a link to it yet.
  • I am told that there was talk about the planned attempt on the radio on 10/6.  I have no idea who was talking about it.
  • NBC and a few other outlets reached out to me on 10/6 to discuss doing a ride along… unfortunately my day doesn’t (didn’t) allow it.  They are all welcome to join me for a drive on another day.
  • I hear that the Juice is Loose and I am hopeful that it is my car chased by the helicopters on TV instead of his… is that wrong?

Regardless, I’ll post more when there is more to report. I would also encourage anyone interested in historic cars to consider rescuing one. There are many Model As and Model Ts that have survived all these years that are looking for home.  Most (ok, many) counties have a Model A or Model T club.

If this is the first time you are visiting this website, you need to scroll way down to get beyond the engine repair technical stuff if you want to get a laugh at the car being broken down on the side of the thruway near Albany or needing water due to radiator problems on route 17 or driving through Times Square.

“Hey John, I am NOT calling about my car. I don’t want to talk about my car. There is a car show in Nyack tonight {two weeks ago}. I thought you would want to show off your new 1940 Ford”. The response from John was, “I am having a martini with lunch”. I thought to myself, “this could go one of two ways”. What did I know? It went a third.

Since the engine and transmission were removed by me (2014/2015), rebuilt by professionals (2015) who let me help, and reinstalled by me (2016), the car hadn’t felt right and kicked out of gear when going up a steep hill. Excepting for breaking in the engine and for an occasional parade, the car has effectively been off the road since my attempted Burlington VT roadtrip ended in Albany NY back in 2014. It took time to get the engine out, time to get it up north to the engine rebuilders, time to get it back, time to reinstall all the parts, time to break things in, etc. This time was rewarded with a car that couldn’t be driven.

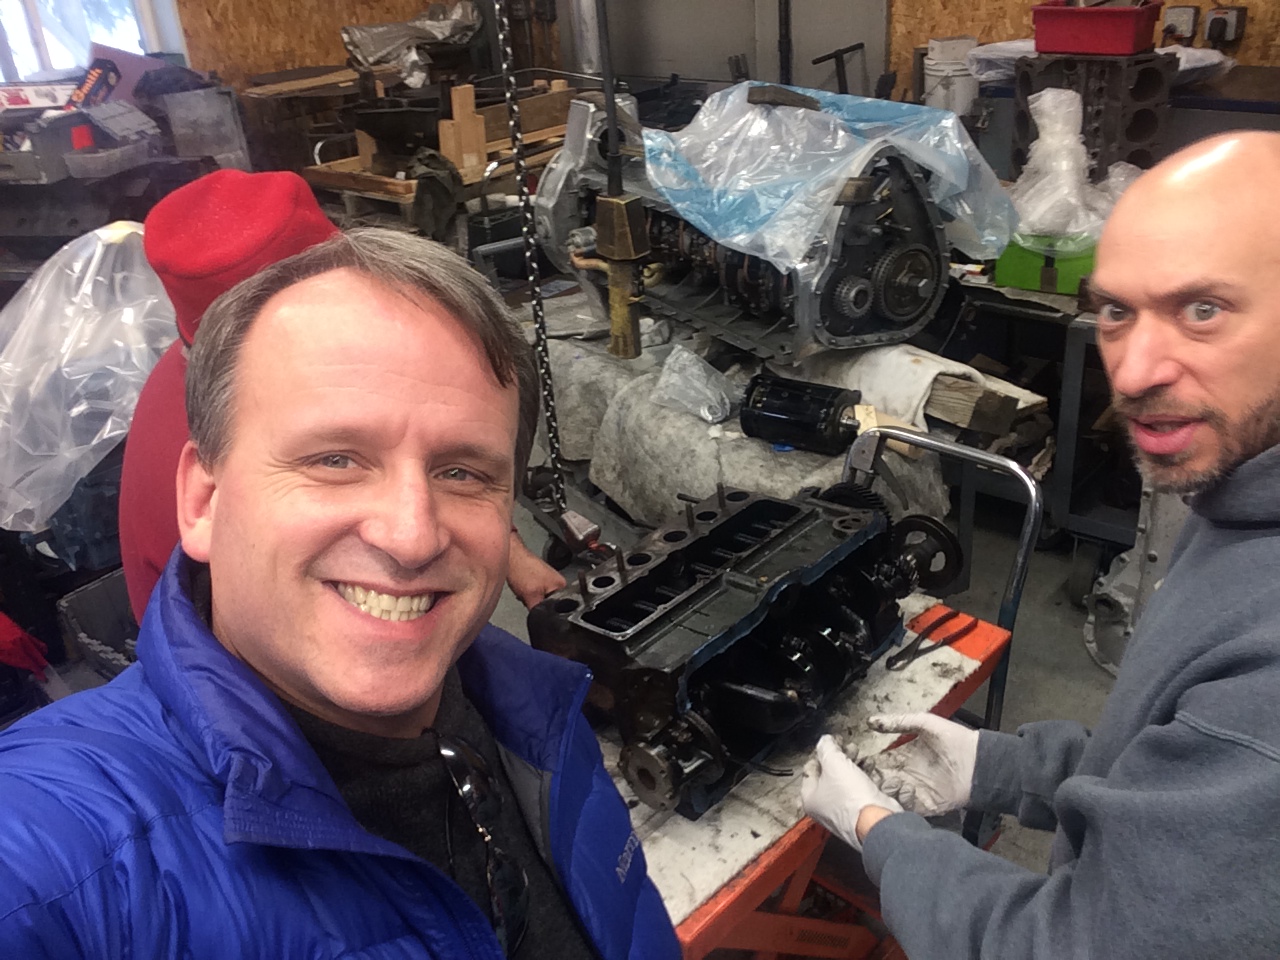
In troubleshooting, I had amongst other things, temporarily swapped out the transmission tower with a known working one. I did this because I was told the majority of transmission related problems originate with the tower and figured that if a working one was swapped out and it fixed my problem, then the problem would be in the tower (and I would not have to take out the engine or transmission). The swap out seemed to help the problem a little but the car still kicked out of gear. This led me to conclude that the tower and its parts were ok. Having done this and in hopes to diagnose a problem instead of replacing parts randomly (and having to remove/install the engine and transmission countless times), I researched every possible cause of the kick out problem (with calls to the boys at J&M Machine, Steve Mitchell from Mitchell Overdrive, MAFCA’s technical director Jim Cannon, Les Andrews who literally wrote the book on Model A repairs, Tom Edny who is a transmission guru, and too many other people to list). What I found was that I didn’t have the time/tools/skills to do this work alone. As mentioned in the past, John Karal is our local Model A guru. You may have seen his high hit youtube video rebuild of my 1929 Phaeton’s transmission and a controversial video of him measuring warp on my rebuilt bellhousing. The car went to John’s garage in June.

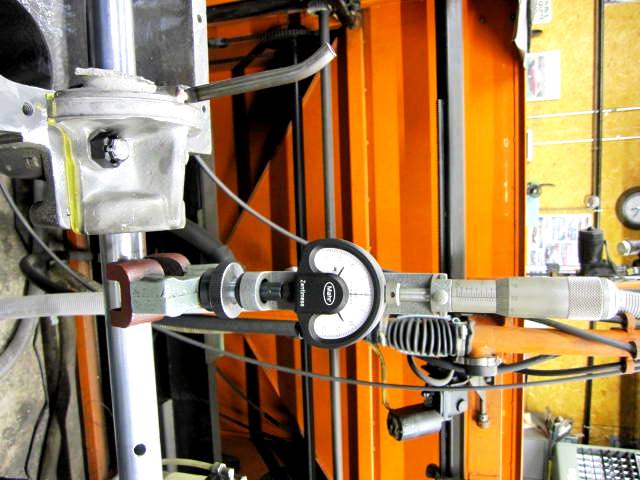
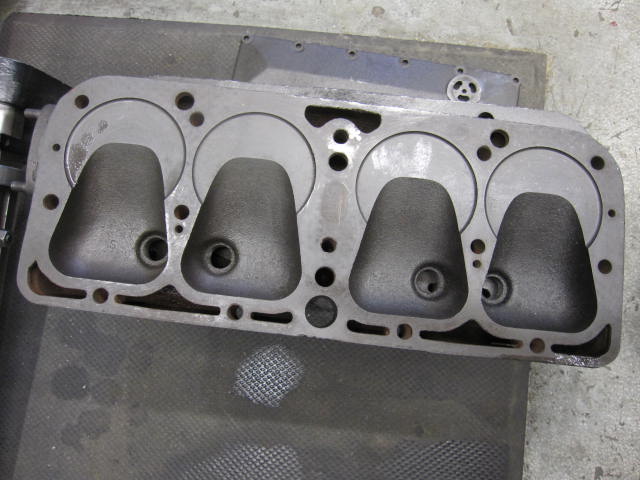
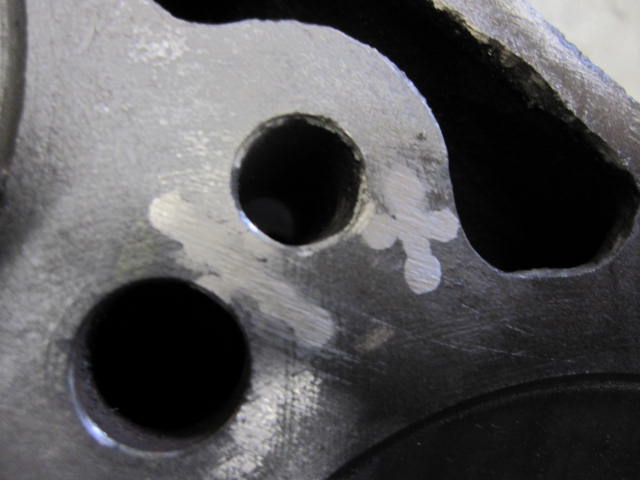
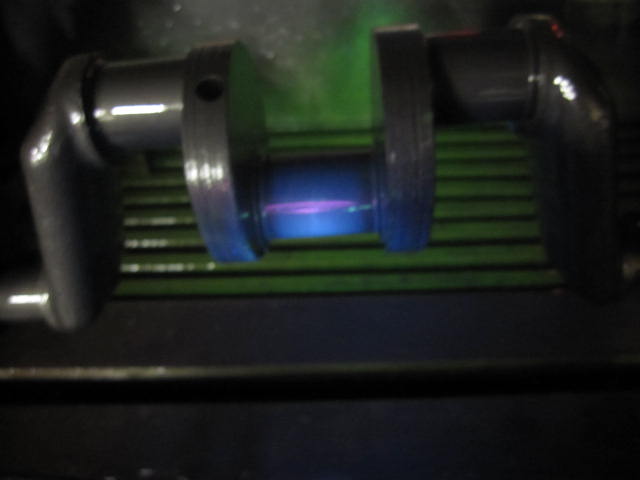
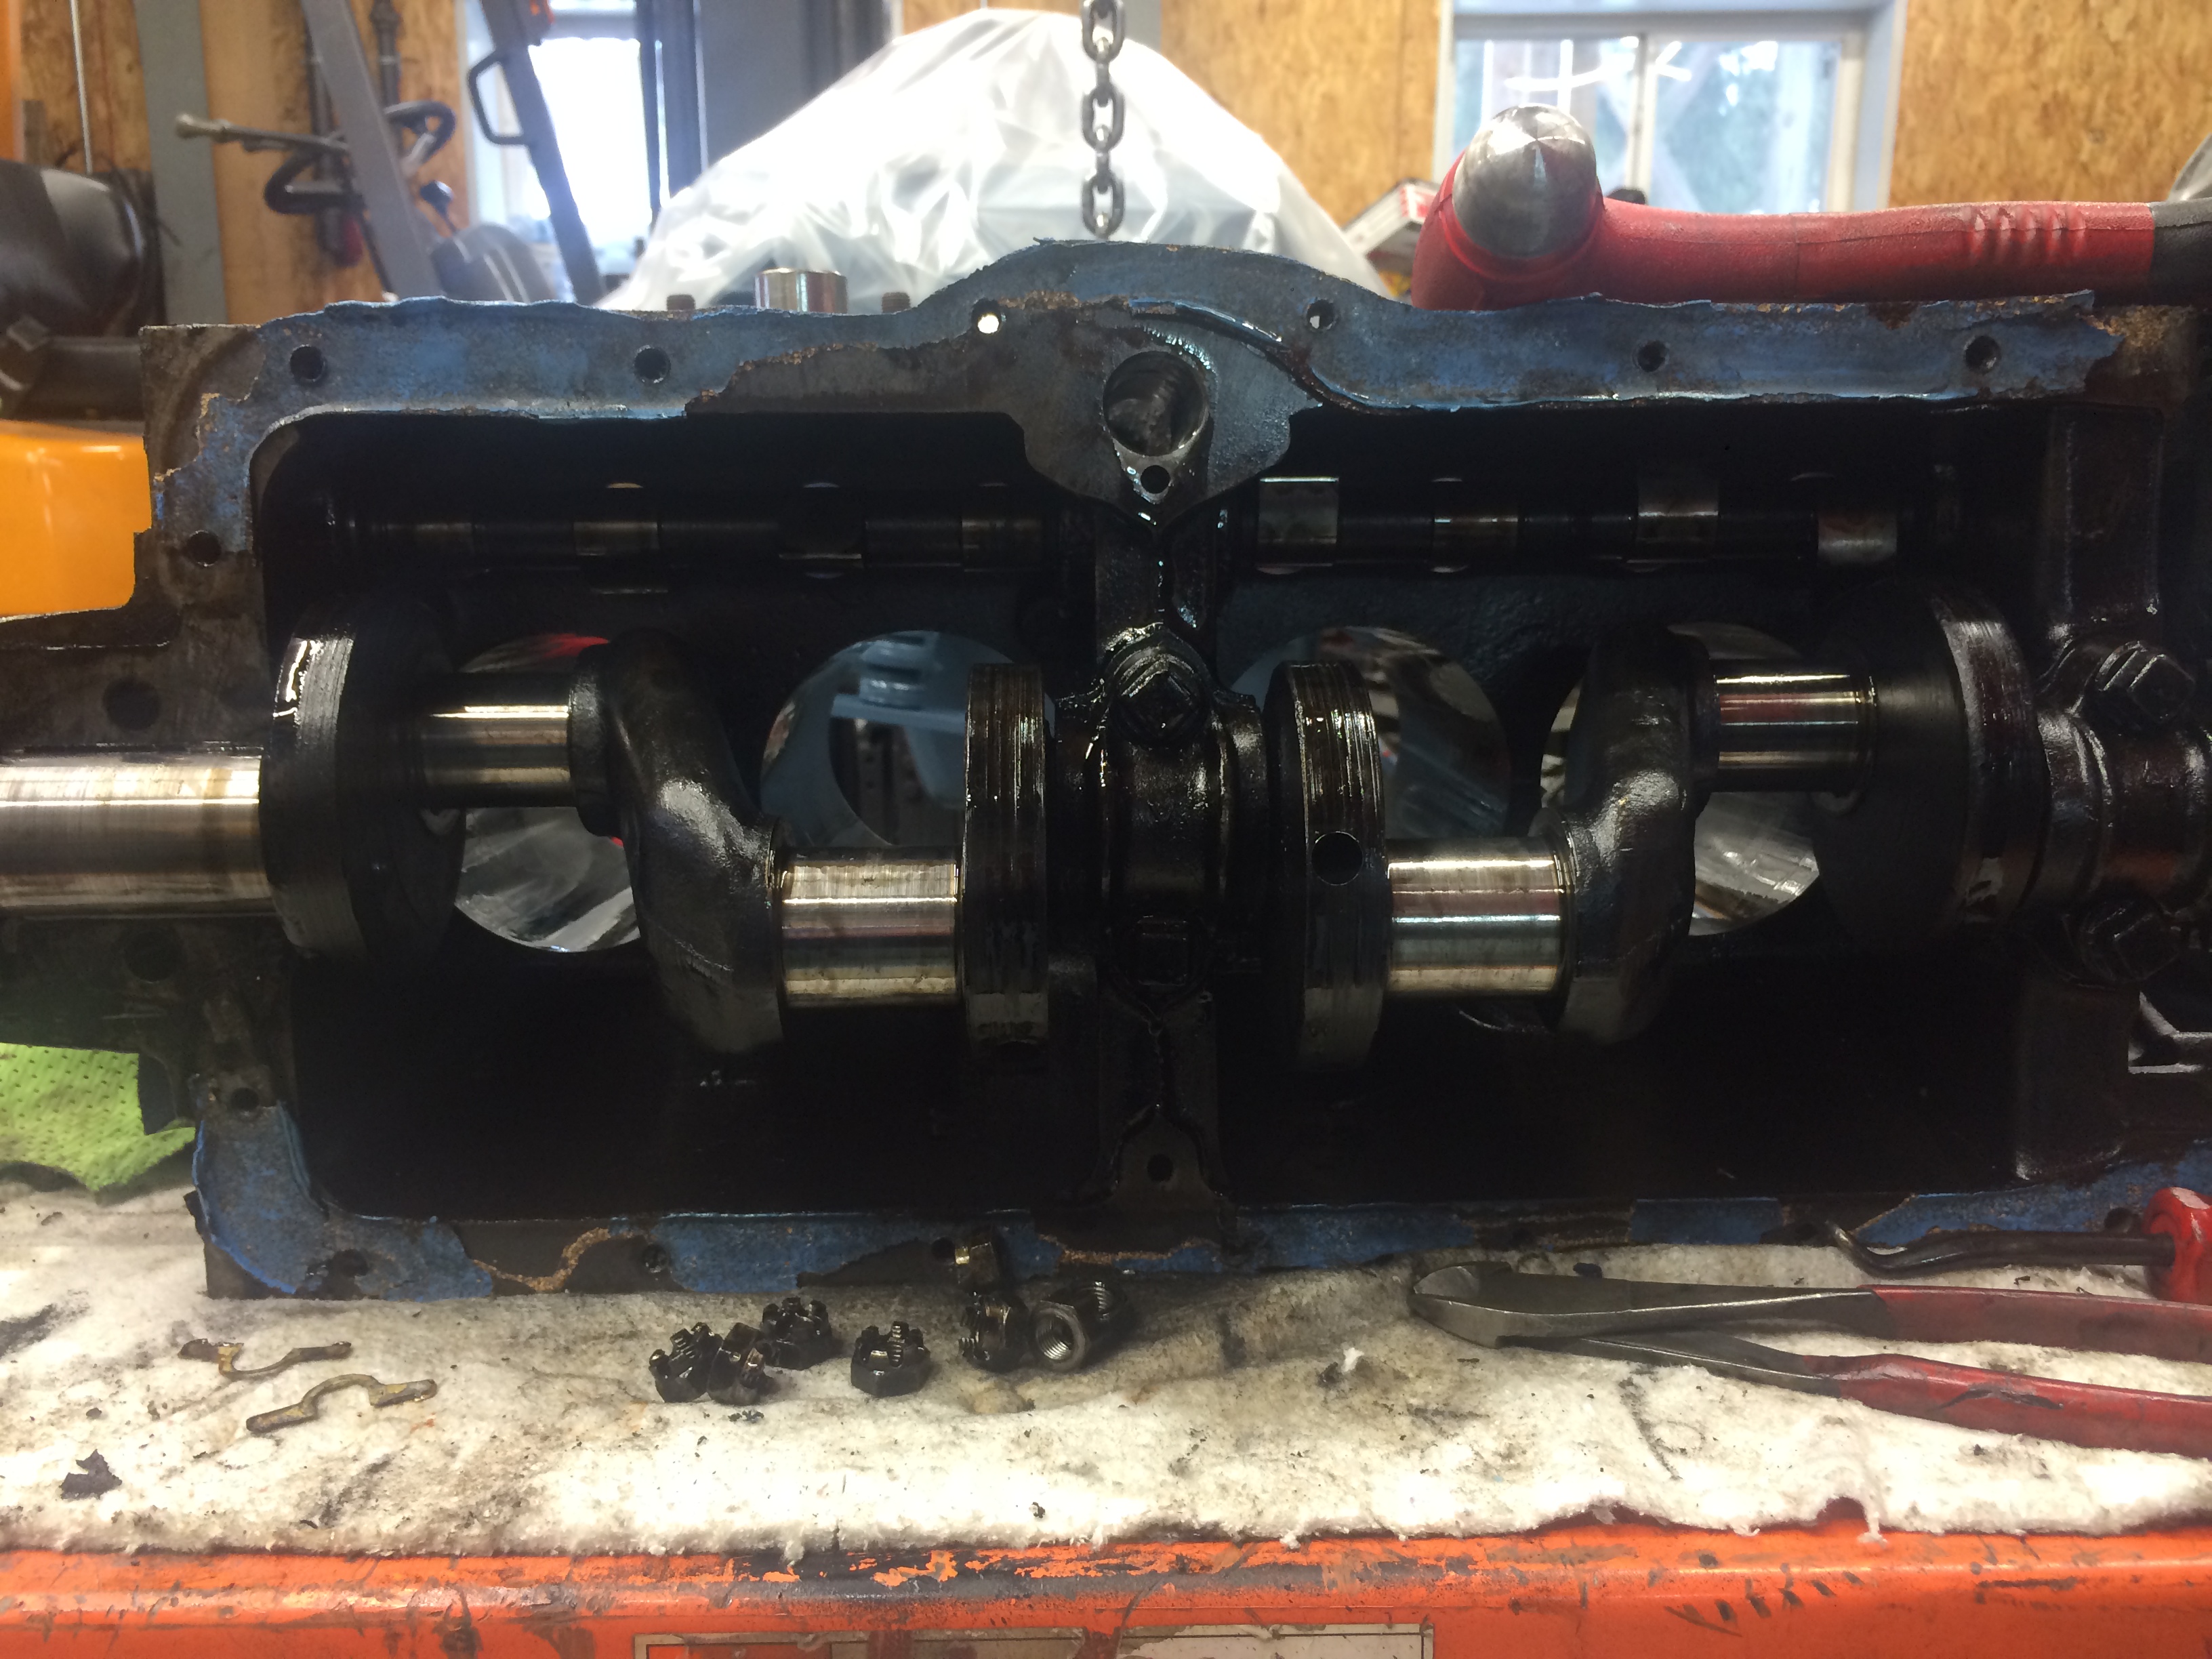
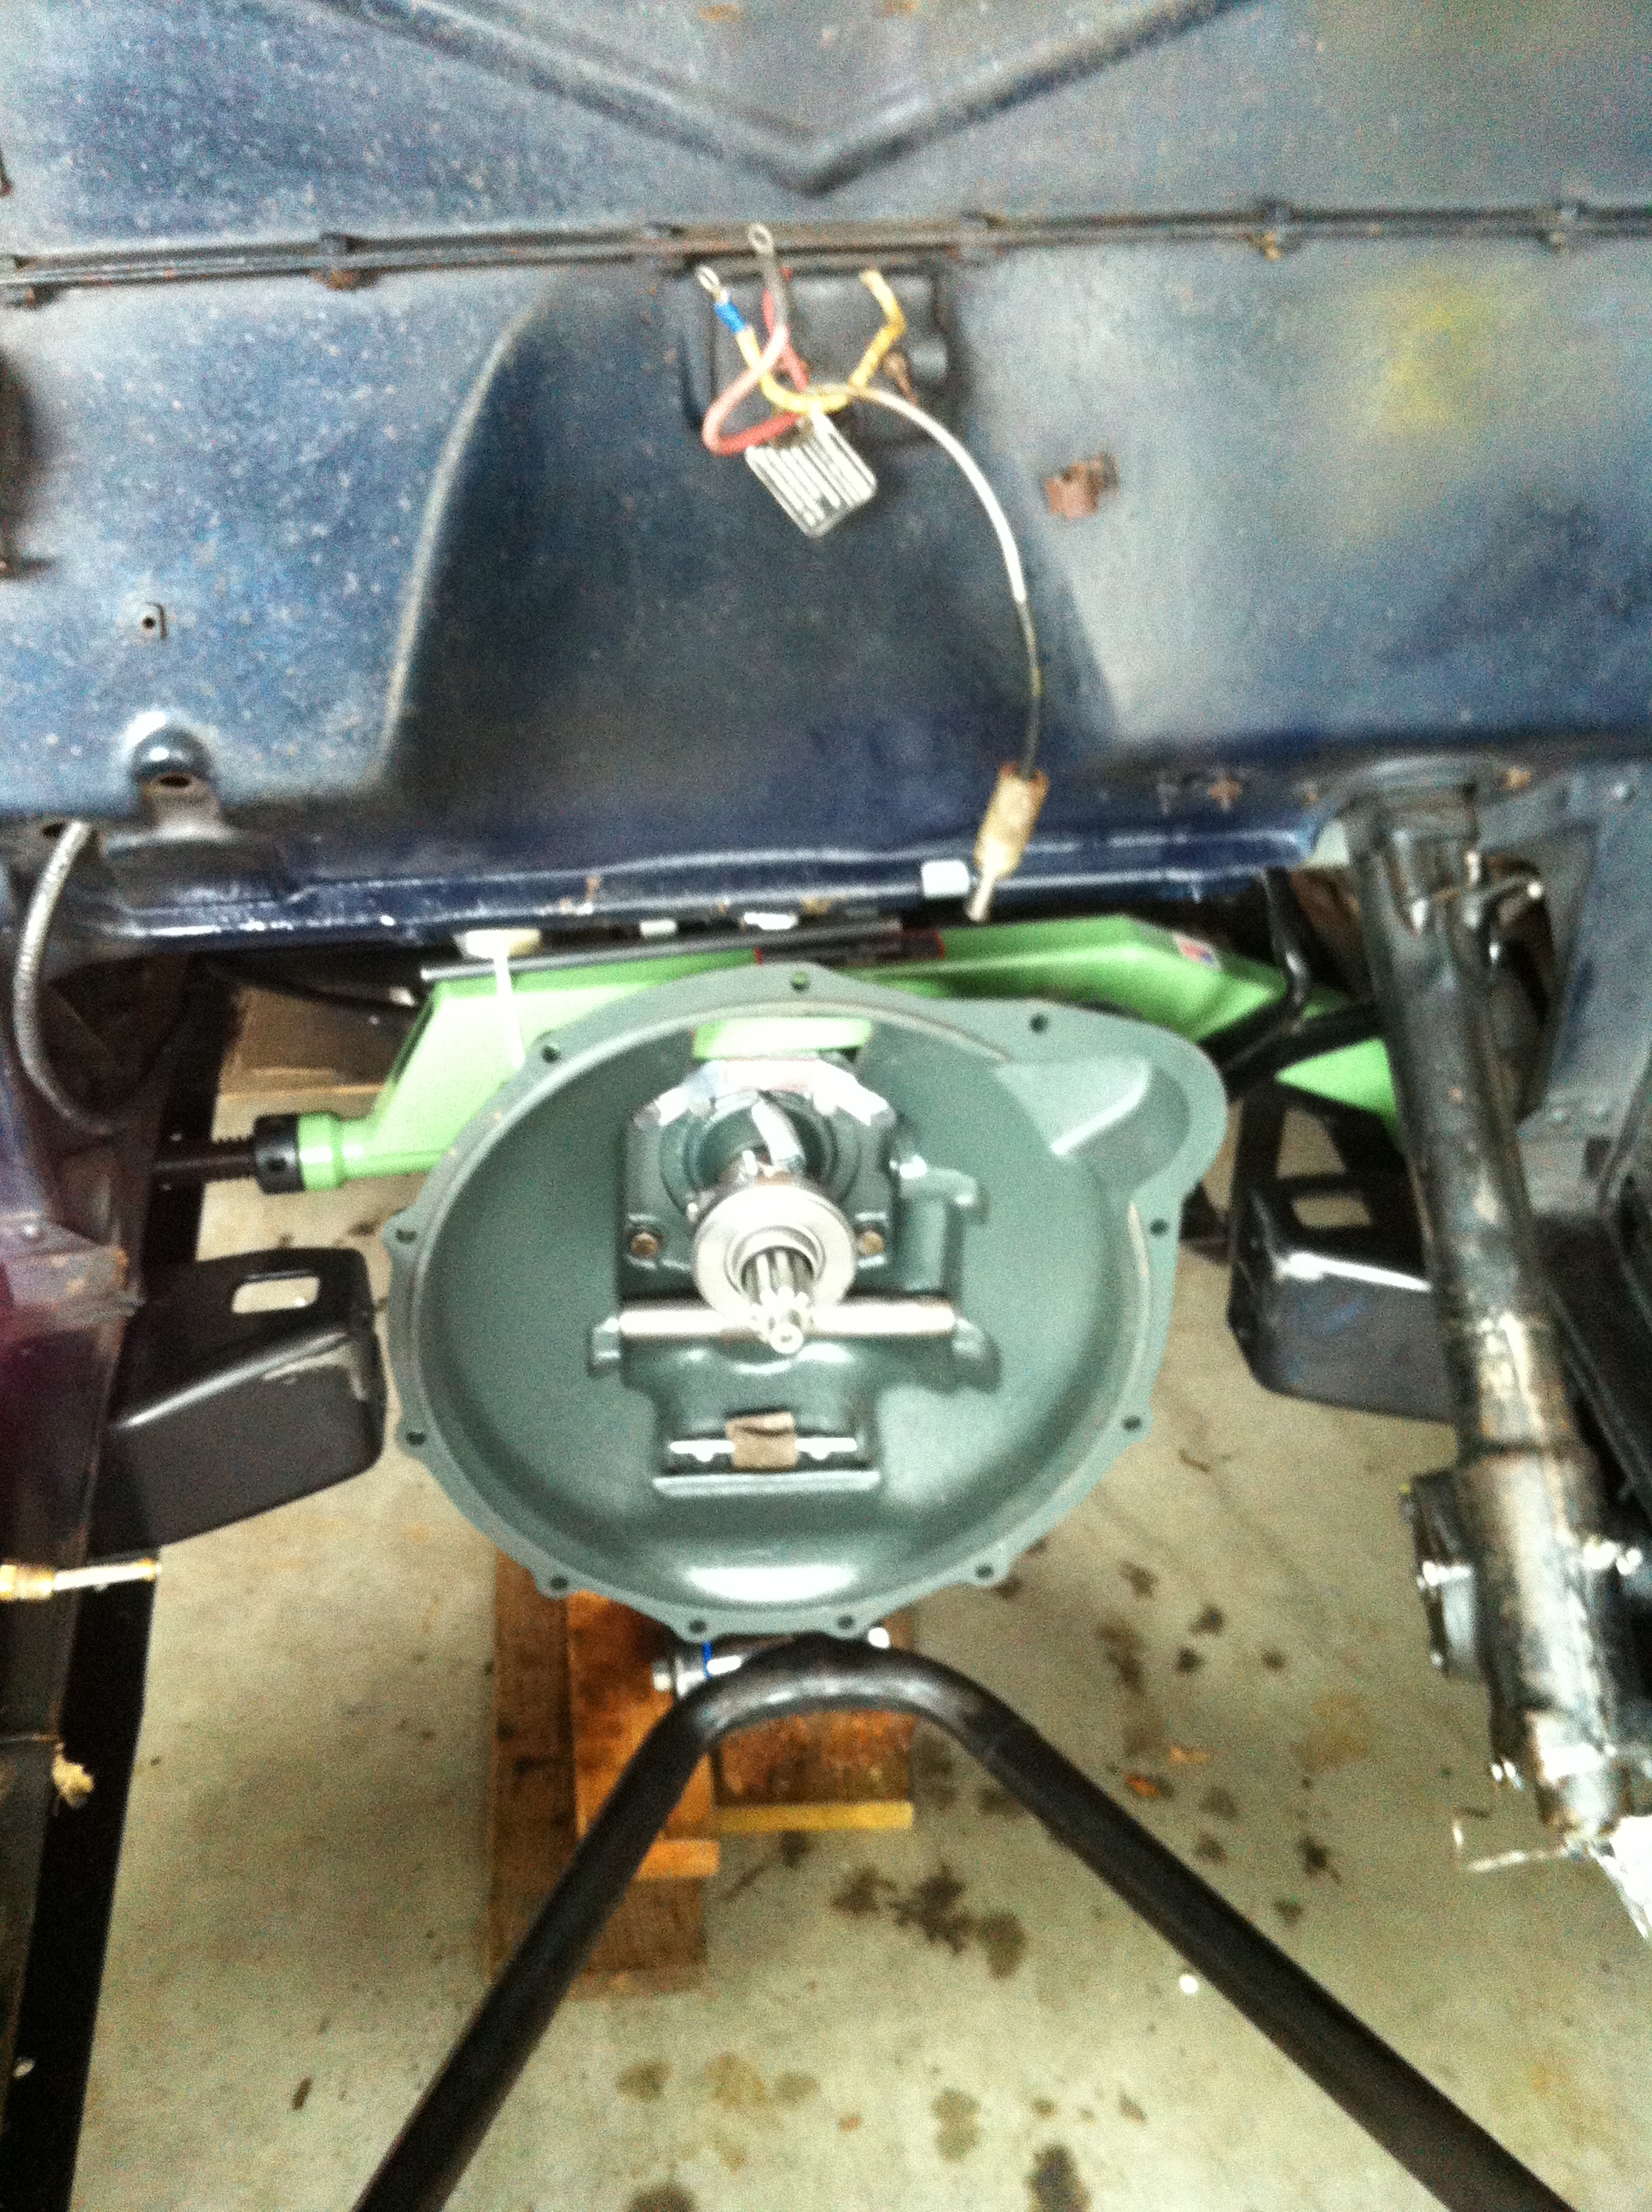
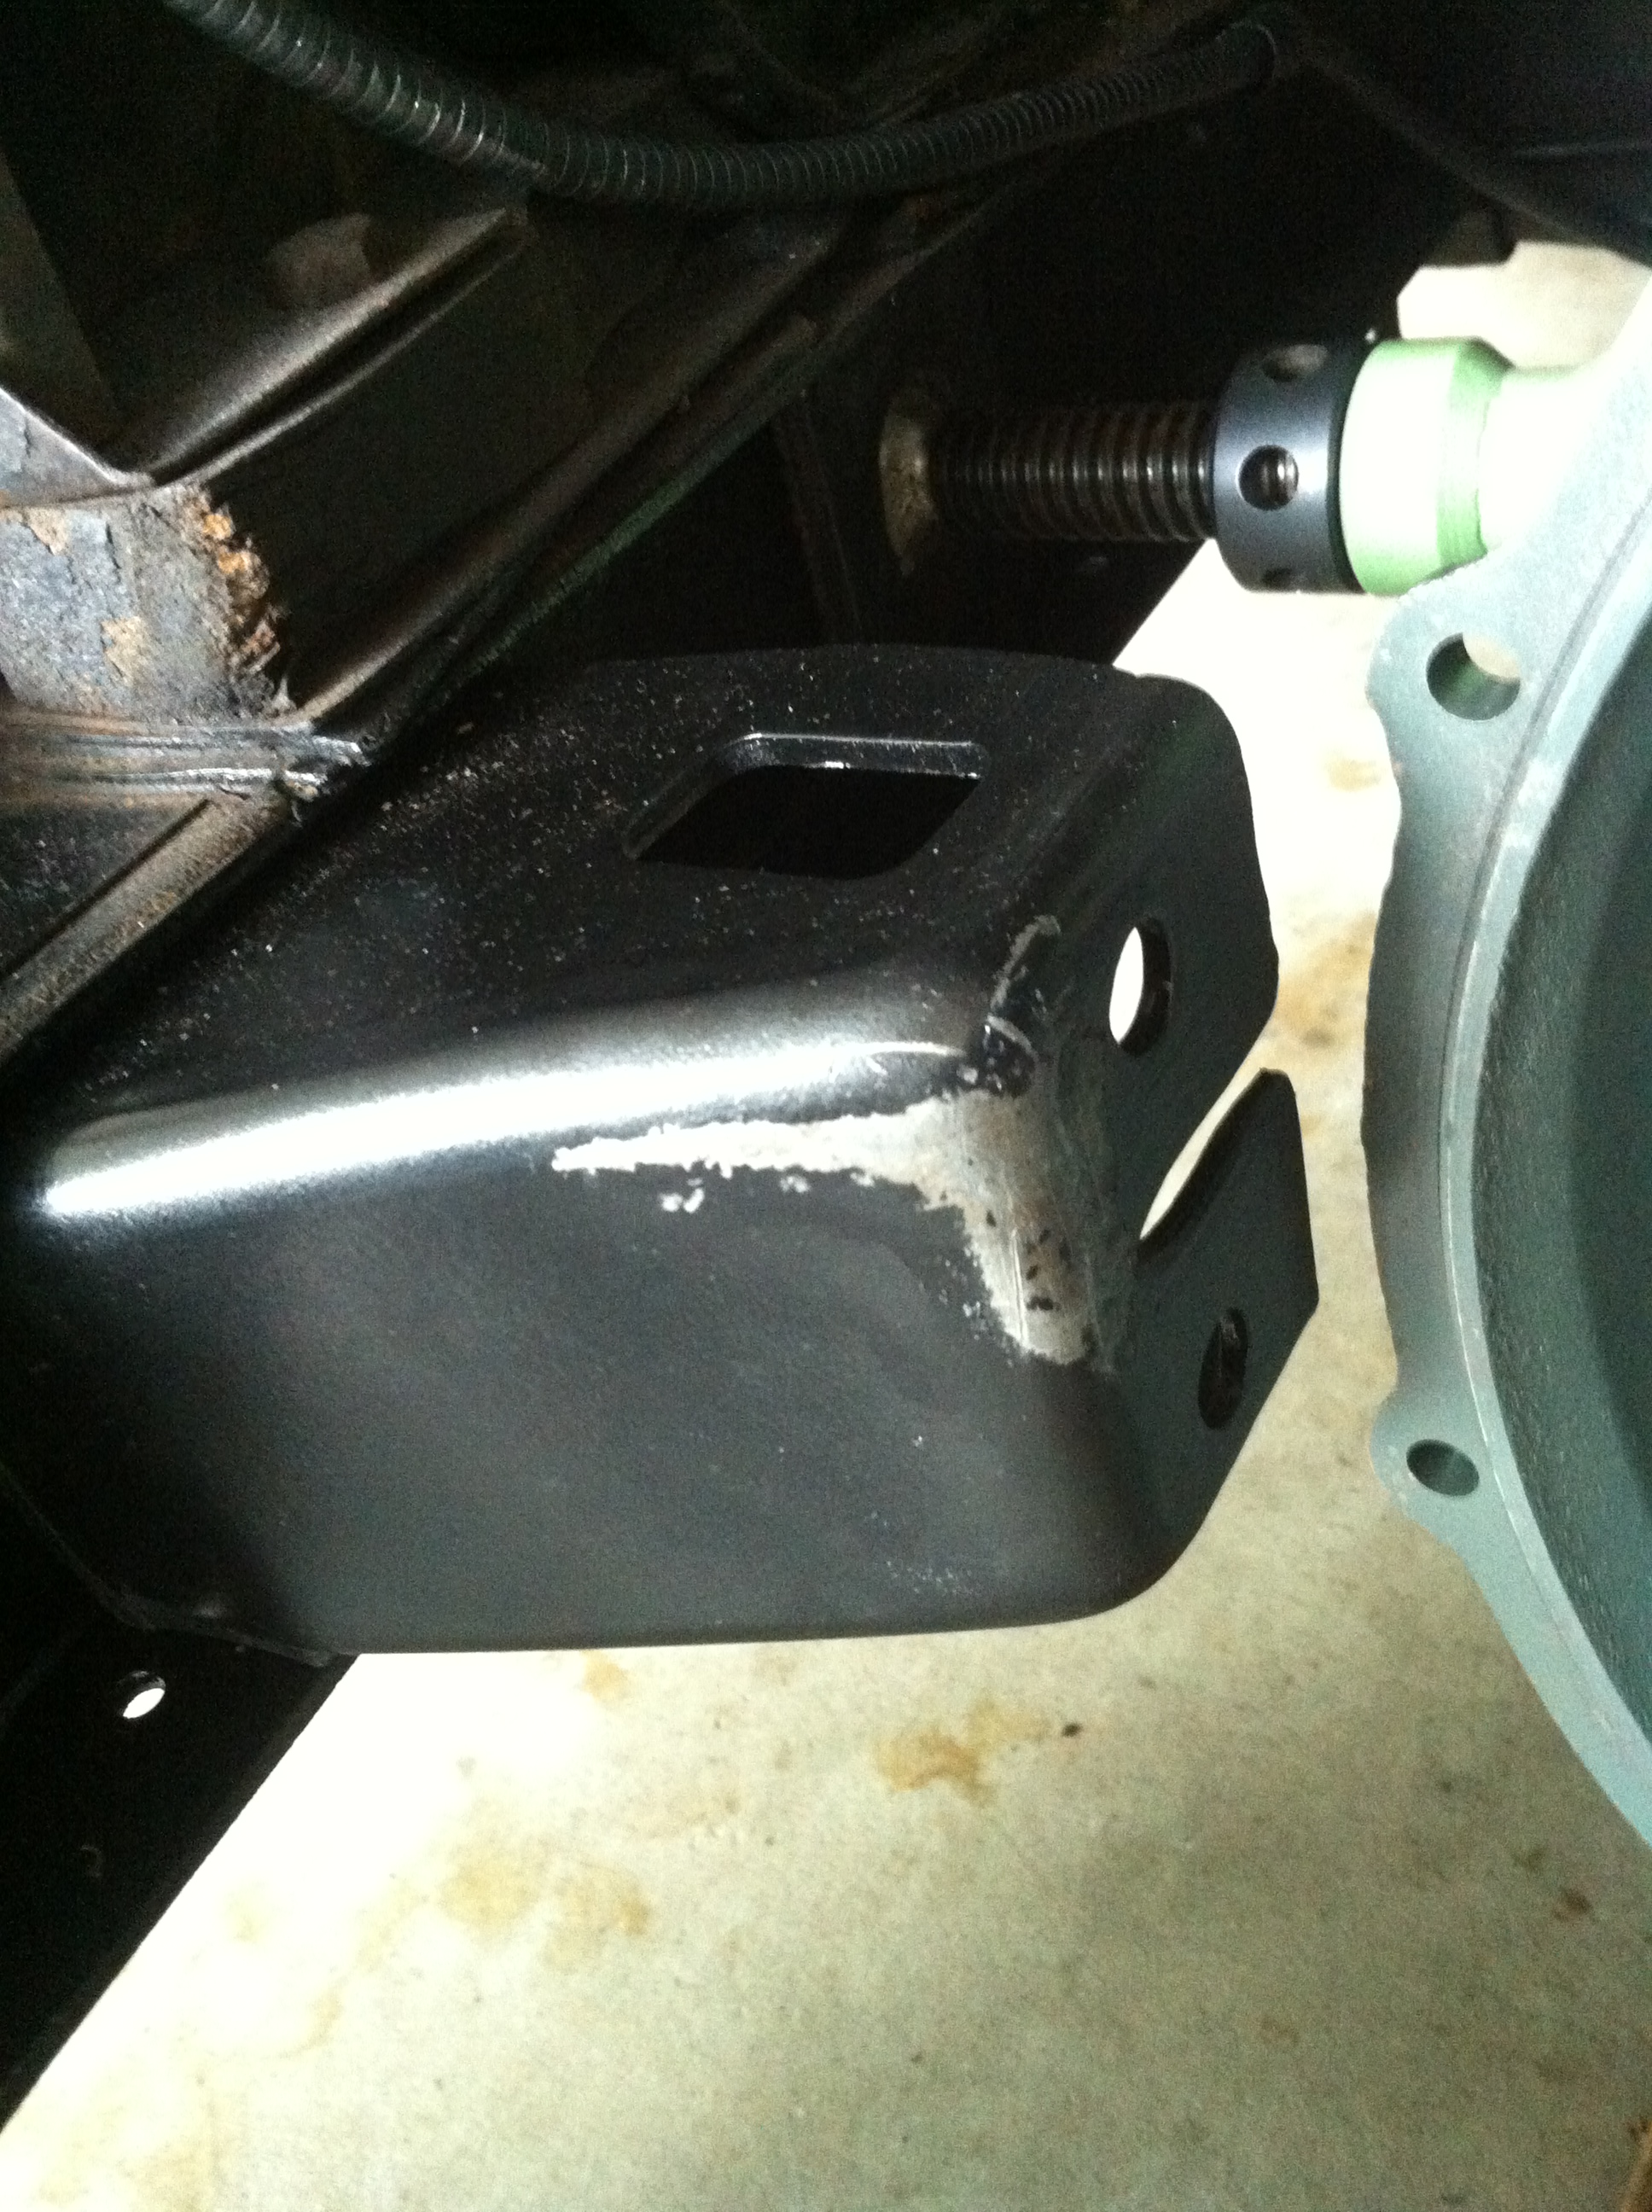
Les Andrew’s book notes that a warp in the bellhousing COULD be the cause a car to go out of gear if under load (such as going up a steep hill). The first think John did was remove the engine, measure the trueness of the bellhousing, and swap it out with a new one. Using a dial indicator my original bellhousing exhibited a warp of 52/1000s (measured “on the block” and with its thick gaskets torqued tight and evenly). John is going to re-record this video at some point incorporating some of the suggestions he receive and some more of his findings. 52/1000s is well above the specified tolerance of 6/1000s. The replacement bellhousing was an original that measured a warp of only 1/1000 top to bottom and 4/1000 side to side. When installing the horseshoe shims on the reinstall, John utilized feeler gages to measure what would be the correct shim size. This was done with the dial indicator remaining in place. According to John, the new (at least to me) bellhousing was effectively perfect. John also insisted that since the engine would be going in/out of the car potentially more than once, that the original motor mounts be replaced with “float-a-motor” mounts because they would facilitate future uninstalls/installs and that I could eventually put the originals back into the car. So much for me going “all original” (I’ll change them back at some point when I am ready to do the frame off paint job). With this work completed, John took the car for a test drive. The test drive yielded a car that, instead of forcefully kicking out of gear would gently slush out of gear. So, we would likely conclude that the tower is fine and the engine is fine. He went hunting for other things.

John’s next thought was to check/measure the modern universal joint that replaced the original. The universal joint I had installed was a very well made one from Bob Drake and purchased from Brattons. I am told Drake’s parts are normally great. John reports that this “correct” part has a different design than the original one. Part of the design is a concave washer that was “captive” (it can’t be removed).  John believes this was installed backward by the manufacturer. He suspected that this might enable to the U-joint to move about 1/8th an inch which could in turn cause the transmission shaft to move and kick out. <<< Quite frankly, John lost me in his description>>>. John happened to have an original style universal joint in his room of parts, so he decided to swap out the new one with the original one. The Bob Drake part was swapped with a nearly perfect original style u-joint. I’ll be reaching out to Brattons who, as always, has stood behind their parts and did note that they stopped selling this part shortly after I purchase mine.

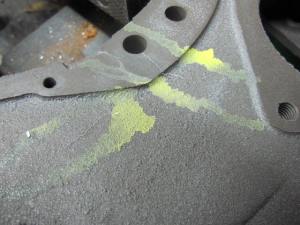
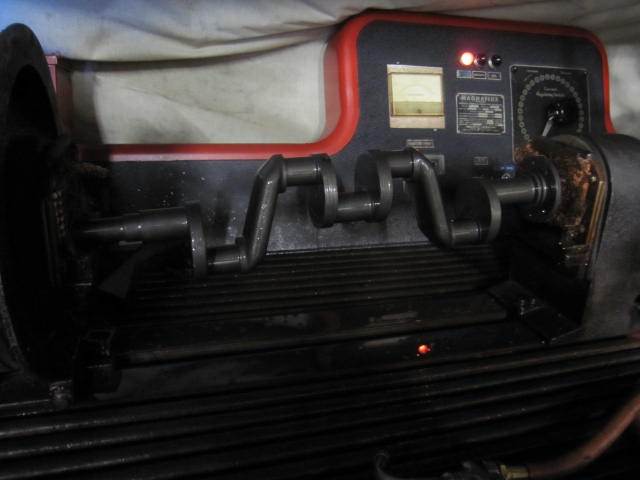
Before putting it all back together, John wanted to measure all the other parts (including those in the transmission) and use Tom Edny’s checklist on what causes a transmission to go out of gear as one of his guides. I was also encouraging the possible swap out of the entire transmission to a known working one this way we could definitively rule out issues with the engine and universal joint. With this all in mind, I though it wise to reach out to Jim Cannon at MAFCA so he could share his insight. Jim already knew of my car and was happy to lend his expertise. When it became apparent that my ability to relay information was going to be insufficient, I asked John and Jim if they could speak directly. After a few failed attempts, Jim and John spoke and John accepted that their might be a glitch in the transmission (the very one he rebuilt in the online video). Keep in mind, we already ruled out the tower as we swapped it with a known working one. Based on the conversation, John changed the transmission main shaft in case the clearance between the main shaft and the 1st reverse and the high gear was a problem. Apparently, when you install a gear onto the shaft, it should slowly slide down (as opposed to drop and klunk into place). John noted that on the replacement shaft, the gears slowly settled into position (after John “lapped” the shaft and a replacement 2nd high gear was used as the one in there had a 6/10,000 clearance and the new one had 2/10,000 clearance).When replacing the 2nd High gear, John noticed “witness marks” (a scratch or dent that evidences that parts were touching) where the gear and the forks meet. GUESS WHAT….THERE SHOULDN’T HAVE BEEN ANY MARKS HERE. Apparently the fork was not sitting against the gears properly. The forks are part of the shifting tower – you know, the very tower we swapped out with a known working one OVER A YEAR AGO. In looking at the marks, John saw that the marks weren’t even (they were NOT true to eachother). This means that something was bent or not sitting right. As the gear couldn’t have been bent, it must have been the forks. After measuring the forks, John concluded that the forks must have gotten bent when he was installing them onto the shifting rod.

I want to stress again that I did previously swap out the tower with a known working one and it did not solve the problem…. so there was no reason to believe that the problem was in the tower (including the forks).

This isn’t where the story ends.  John and I take the car for a drive before I officially pick it up. The car seemed to drive ok.  There are a few things I noted when we got back to his shop:

  • Slight oil leak from #8 bolt (probably a touch of gasket sealant will fix this. I am ignoring it for now)
  • Slight leak from side of headgasket (I am ignoring this for now)

We quickly retorqued the engine.

John gave me a list of things he did/didn’t do to the car including telling me that the rear light wiring wasn’t right, the horn was broken, the floor boards weren’t located down (so I could adjust the brake lights), that he rewired the front lights back to the original ford-plunger style (which I hate), that he un-adjusted the brakes to make installing the engine easier, etc.

I leave for the 15 mile drive home.  After the first bump in the road, I hear a CLANK and then the sounds of what I assume was a drip pan hanging from one side and clunking up and down – the gas pedal top also came off and thankfully landed on top of the transmission and not through to the road. I decide to stop at my sister’s house which is around the half way home market to check under the car. I get to my sister’s house and there is oil now dripping steadily on her driveway. I move the car to the road. I am just hoping that the rear main wasn’t damaged as the dripping was coming from what looked like that area of the engine.

With a closer look, there is a solid drip of oil from big cotterpin under bellhousing, there is evidence that of lots of oil came out of the filler tube and the dipstick hole.  So much for a nice clean engine – actually, I am kind of pissed that I now have to clean it. I checked the dip stick and even with a car that was just driven, it is WELL above full. I called John to let him know and he thinks he may have overfilled the oil. He told me that he probably did and that it will find its own level after being driven for a bit (and I should put something under it in in the garage). If it is an overfill, this is just an inconvenience.  With the drip pan back in place (using a washer to help the cause), I drove home and placed cardboard under the car to catch the dripping oil.

That Sunday I quickly rebolted the drip pan (filing down washers so they would fit properly and make up for old tabs that are work away, visited the wiring for the brake light (which was fine), adjusted the break light switch which was set at a position where it was always “on”, and removed and brought inside the horn which I quickly rigged to work (I’ll do a “more correct” repair later). I then took the car up the biggest hill in the area. It remained in gear.

The car remains “unfinished”. I have to go through my stuff and find everything I removed and put things back. There are parts such as the felt for under the pedal plate that I have to find/order and other things such as floor board screws and cup washers that I haven’t seen in years.

It’s been years since I’ve been able to drive the car or since it has been all in one piece. It will probably take a few weeks before I have the chance to put it all back together and finish bringing the car back to where I want it. Last Monday I brought the car for the annual state inspection. Last Tuesday, I brought it to a village event in Nyack. Two days ago, I drove it 20 miles up/down hills and yesterday I went on a nice 15 mile drive.

IMG_7738

While it is great having the car back, after the engine and transmission were “restored”, the follow up repairs to fix this “out of gear” issue (which never should have happened and seems to have been the result of multiple issues) costs me a few thousand dollars and countless hours. In this regard, I can’t help to feel a bit forked over and just warped from the process. I guess the universe just wanted to keep me off the road for a little longer. Hopefully it will be 80+ more years before I have to go through anything like this again. As the moon rises over the Hudson River, I think it is time for me to go get myself a martini — or perhaps a pint of tequila.


Gearing Up —or Out

Posted: January 10, 2016 in Uncategorized

So, I am back on the road.  Kind of but not really.  I’ve put 110 miles on my rebuilt engine and transmission and noticed that the car keeps kicking out of second gear.

John (the local model a guru) and I took the car for a drive, opened up the transmission, and saw nothing standing out as “wrong”.  So what’s going on?  Well, it can be as simple as a “new” part being “close but not close enough”.  That stated, which part might be bad is unknown.  It could also be a warped bellhousing or other part that needs to be replaced (ugh!  I just had these parts completely rebuilt). It can also be a bunch of other things — like a gasket being the wrong size. So what do I do now?  First, I try to borrow a known working “transmission tower” to swap it out with the one I am using.  (Do you have a 29 ford transmission tower you are willing to let me remove from your car?).   The problem probably isn’t in the tower, but swapping towers is an easy way to rule out the tower.  I’m hopeful it is a weak detention spring.  If the car kicks out of gear with the good tower, the transmission will need to be remove — which means removing either the rear of the car or the engine.  Yeah, I’m not so happy.

Short on everything but shorts

Posted: September 13, 2015 in Uncategorized

So I smoked some wires the other day and am now hunting down shorts.  My newly rebuilt J&M Machine Shop engine has 5 miles… yup ONLY 5 miles.  Since getting everything back together and having broken in the engine, I developed a bunch of electrical shorts.  I think the engine gremlins got angry and called in their cousins.  I’ll update you on my adventures in the headlight switch arena at another time.  Today I am taking a brake (no, i didn’t spell that wrong)… a brake light switch to be more precise

Basically, one of my shorts was in this switch.  This sucker was heating up like you wouldn’t believe.  The ammeter pegged past -20 whenever I stepped on the brake.  So, since it was already broken I decided to take it apart myself.  Here is the video.  Easy to fix!

Yes, 4 attempts were made to get the rebuilt engine into the car this AM.  They all failed gloriously.  Let me go into quick detail of the adventure that Len, Gene R, and I had.  Len and Gene arrived at 9:30 ready to have at it…. by “it”, I mean the muffins and coffee.

Attempt 1: Gene started off by suggesting we remove an engine mount to make thing easier and then reinstall it later.  I passed on this and stated that I wanted to try to do things the traditional way first.  So, we jacked up the transmission until it almost touched the firewall.  We placed the engine on a hoist with a “tilting” attachment (so we could change the angle of attack of the engine and “dial in” adjustments).  We got over the motor mounts started getting close and noted that the tilt device wouldn’t clear the coil.  We removed the coil and gained more room.  We removed the front engine mount to gain more room. The engine would not sit on the rear mounts and was hanging at a 3% clockwise…… we aborted the mission after figuring we couldn’t get the tilting attachment and hoist further into the engine compartment without doing damage.

Attempt 2: this time we used a traditional engine lifting attachment and followed the Les Andrews book in terms of placing the lifting point above the #3 spark hole…. no pitch=no good.  We scratched the bottom pan against the front frame a few times.  We bumped the guide bolts against the fire wall a few times. We aborted the attempt and had more muffins.

Attempt 3: Why not try again?  If you do the same thing over and over again, eventually shear willpower makes things happen.  I greased up the leading edge of the rear engine mounts and we put more attitude on the engine (so the front was higher and the back was lower).  After futzing for a bit, I hear a “POP”…. it is just a bolt against the fire wall and no harm done excepting a scratch on the wall — which isn’t is great shape to start.   Mission aborted.

Attempt 4:  Why not reset everything and go at it one more time.  This time with the frame spreader in place.  We lower the transmission a bit.  Install a frame spreader and give it a little crank and start hoisting in the engine.  We don’t have the angle on the transmission to make this work and can’t get the engine in.  FAIL FOUR.  It is now 2:00 and time to call it a day.

What did we learn?  NOTHING

How long did it take us?  about 5 hours

Is the engine installed?  No

In retrospect, perhaps Gene’s suggestion on removing a rear motor mount was the right one.  It was too late in the day to try it.  Tomorrow AM another attempt will be made.  John Karal, the local model a guru and mechanic will be joining me in Nyack.  As I see it, Len, Gene and I did everything correct. J&M Machine must have been feeding my engine fatty foods and not running it, as the engine is apparently bigger now than it was when I got it out of the car. (Ok, we know the engine isn’t bigger and that motor mounts may be part of the problem — regardless special thanks to Len and Gene for putting up with the nonsense.  You are both owed some beers and burgers. )

image photo image (1) image (2)

Transmission work: REASSEMBLY

Posted: June 30, 2015 in Uncategorized

Here is a video of my transmission being taken apart and rebuilt by John Karal

Its good stuff and a GREAT “how to”.

A Model (A) of In-Efficiency

Posted: June 10, 2015 in Uncategorized

I HAVE MY ENGINE BACK!!!!!!!!!!!!!!!!!!!  It took me forever to pick it up.

IMG_5088[1]

Let’s go through the timeline since the last post…..

It is 4/10/15 and J&M has let me know that the babbitts are poured and the rods are balanced.  They are waiting on a clutch from the supplier.

Pour the Babbitts

Balancing Rods.  You would think the rods are balanced.  They aren’t.

Is this manly stuff?  Yes….but I have to keep myself from commenting that they are handling rods and playing “Girls Just Want to Have Fun”.

Do you know how to line bore a block?

IMG_2089 IMG_2090 IMG_2093 IMG_2094 IMG_2095 IMG_2096

Machining the Thrust so there is less leakage.

It is now 4/14/15 and there has been little recent progress on my Phaeton.  Even if all the pieces/parts were magically to appear in my garage tomorrow, I wouldn’t be able to reassemble the car until sometime in May or June.  So what is going on?

1)      I’ve been busy at work and haven’t been able to get to my to do list as I am working during the weekends:  What do I need to do:

a.       Address the front cross-member.  Sand it down, weld any found cracks, replace a rivet, prime and repaint.  I figure that this will take a couple of hours to strip/sand and a few hours of my cousin’s time welding.  To do the welding I need my cousin Robbie and some rivets from John Karal.

b.      Replace the rubber in the rear engine mounts.  This is probably a couple of hours of work.  I’ll also sand, inspect, prime and paint these parts as they tend to develop cracks according to John Karal.

c.       Clean garage from the parts piles that grew over the winter.

2)      John Karal, the local Modal A Guru, is having his knee replaced.  Len and I wanted to video John assembling the transmission and we all agreed that it would be awkward to do the video at the rehabilitation center.  The reassembly will likely occur in early May.

3)      Brattons

a.       Brattons is waiting on a pre-painted exhaust manifold.  They had the unpainted on, but I wanted to go with the painted one.

4)      J&M Machine

a.       J&M are now sitting with 8 Model A engines in various stages of completion.  Mine is in the works.

b.        The clutch is ordered and pending from the manufacturer who is behind schedule in delivery.  Once the clutch is received by J&M, they can reassemble the engine and I can schedule the pick-up.

It’s now 6/1/15 and the engine is in my garage.  J&M and I had some coordination issues related to the engine.  They had a delay waiting on their clutch supplier that pushed the engine completion date to the later part of their original time estimate (they estimated 6 to 9 weeks).  When the engine was done, I had neither a vehicle large enough nor the time to pick up the engine (so it sat at their shop).  John and Mike were great to deal with throughout the process.  They send photos of their progress and were around to answer questions and make suggestions. If you are considering rebuilding your engine, you will want to speak with them.

This past weekend I was able to borrow my mother’s Toyota Highlander and took a daytrip to J&M to pick up the shiny green rebuilt engine.  It is amazing how you can really see the casting flaws now that the engine is clean and together.  I removed the engine from the car solo.  Interestingly enough, the engine was easier to transport without the stand (I used a stack of blankets instead).   The solo removal was actually a lot easier than I thought.

I actually finished the removal solo.

IMG_5088[1]

Ok, back to the check list from April…. Items 4 is done.  Item 3 is done.  Item 2 (the transmission) is going to be reassembled by John Karal this week.  Len Spinelli is going to film this rebuild and we will post it online. Item 1, I’ve done none of this — but hope to do some of it this week.  Rob is going to be by this weekend to weld.

6/4/15 – Went to John Karal’s place to pick up the transmission.  We still need a part.  Filmed the whole thing. Told that they filmed a part before I arrived and John thought my car was a 1928 instead of a 1929 and announced that the transmission was a 1929/1930 version.  I’ll probably do a separate post.

6/7/15—more forward motion.  So today I removed the engine mounts (front and back) as well as tried to drop the front axle to inspect the front crossmember.  The mounts came off without issue.  The front mount .  I may or may not show this as a separate post.

IMG_4800

On March 11, I finally got around to finishing the removal of the transmission.  This was in preparation of John Karal (the NJRA Guru of things Model A) making a visit to Nyack to look over my car and let me know what needs to be done before the engine is reinstalled (and as one more “you should do X while you are doing Y” thing).  John has been in the Model A restoration business for years.  He had an automotive supply company, he was trained in aeronautic repairs (writing the field manuals for things like doing repairs to the carrier jet), and he runs a small shop which services and restores Model As and Ts.  We are lucky enough to have him as our local “go to guy”.  As my Model A isn’t able to “go to” John, John was willing to “go to” Nyack.  Len Spinelli joined as well, picking up John in route.

Arriving at 6:30, John stepped out of Len’s car, licked a finger, put it in the air, felt the wind direction, and then started to rattle of “to do” items for me based on his “I am one with the car” understanding of Model As…. ok, it wasn’t quite like that.  John, light in hand, inspected the car looking at all major areas of concern.  Here were his “big three” findings.

1) The rubber under the motor mounts should be replaced and the mounts should be inspected for cracks.  If you look really closely, you can see the old rubber between the mount and the frame.

IMG_4807

2) The rusty rivet should be removed, the area cleaned, and a new rivet installed.  The other visible rivets looked fine.  Yes, I know the springs look rough…. They are.  I’m not replacing or repairing them this year.

IMG_4808

3) The front cross member should be sanded down, inspected for crack(s) and any found cracks should be tig welded if needed.  It is hard to tell what is old flaking paint, new flaking paint, or possibly a crack under the paint.  I’ll admit that I’ve added a few coats of rattle can black to this part of the car every other time I took off the radiator… and no, I didn’t prep the surface first.

IMG_4806

All in all, it sounded like John thought the car was in moderately good shape. He also made some suggestions regarding the steering column and the front springs… all of which could be addressed at a later time (like in a year or so).

We then went inside where I had the transmission and tower set up on my dining room table.  YES, I HAD IT IN THE DINNING ROOM ON MY KITCHEN TABLE AND PREVIOUSLY CLEAN PARTS IN THE KITCHEN SINK.   You can even see the foil I keep on the counter in one shot.

IMG_4799IMG_4794IMG_4801

This is when John laughed and announced, “this is the worst worn universal joint I have ever seen!”

IMG_4796 IMG_4797IMG_4795

Here is a video of John giving his first thoughts on his first look at this transmission.

After looking over the trannie, it seemed John was pleased with its overall condition (having expected it to be much worse), John focused on the tower.

Just for reference, here are links to “Tom Endy’s Transmission Prudence” and “Tom Endy’s Tower Restoration”.  These are GREAT writeups.  Tom has a whole bunch of tech articles he posted on http://www.ocmafc.org.  You should check them out.

Click to access Transmission%20Prudence.pdf

Click to access Transmission%20Tower%20Restoration.pdf

John believes that some of the original bearings are better than the modern replacement ones and that, if the originals prove to be in good shape upon inspection, they shouldn’t be reused as opposed to replaced.  John suggested that he take the transmission and tower to his shop to properly clean, disassemble, and inspect the transmission and tower. Excitement was expressed by John in that this would also allow him to use a new spring tool that he purchased to specifically help him in his work on the transmission towers.

I drove John home and was privileged to hear tales of his aviation adventures and one notable mishap.  At his shop, which is adjacent his home, he provided some initial advice on what I should (and more importantly should not) be doing when reinstalling the engine.   He also showed me the tools I he suggested I borrow from him to make this all happen (including a frame spreader).  For the re-assembly of the transmission and tower, John has invited Len and myself to the shop to watch/record/help put these parts (and any replacement parts) back together.

IMG_1817

So much has happened to the engine since the last post. The engine is in great shape. It has been cleaned, fluxed, machined, leveled, bored, honed, balanced and by the time I post this most likely poured, peened, balanced again, painted, and reassembled. Most of the work was done in my absence; however, the J&M boys were kind enough to send progress photos throughout the process. They also welcomed myself and Len Spinelli (President of the North Jersey Regional Model A Club http://njra2831.org/, good guy, and camera man) to come to the shop for a day of fun/work/schooling. Len and I met up at the NY/NJ border at 6:30AM and hit the road to get to Southborough Massachusetts for an early AM start (targeted arrival by 10AM.  We arrived just before 10AM.

We started by leveling the head and the block. They are both placed on a level base on a milling/boring machine. The machine head then takes swipes If a swipe “shaves” off something from one part but not another part, then the head or block isn’t level. This is an iterative process. The machine takes swipes until the head is level, then the bit is exchanged for a finishing bit that shines the surface down a wee bit more.
J&M Machine Company Cylinder Head Resurface

Once the block is level, the machine is set to bore the cylinders. There is a complicated process to locate the “center” of each cylinder, as you don’t want to measure on one specific spot, as that spot may be warped or worn down. The cylinders are then subject to the same process as the head, but at specific bore sizes (which match piston sizes). All cylinders must be bore to the same size and must not have warps, rust, or groves that would impair the engine.

J&M Machine Company Engine Block Decking and Boring

Don’t forget to shape the valve seats

J&M Machine Company Cutting Valve Seats

Once all cylinders are bore and the valve seats are shaped, the cylinders are honed and finished with precision. J&M maintain that this is where many shops skip a step.

J&M Machine Company Cylinder Honing

J&M Machine Company Cylinder Hone Finish

Let’s not forget straightening the crankshaft

Here are some photos of my crankshaft that they addressed prior to the visit.  I know a bunch of cranks I would like straighted out….

IMG_1801IMG_1803

(this crank in the video isn’t mine).

J&M Machine Company Crankshaft Straightening

…and then grinding it.

J&M Machine Company Crankshaft Grinding

They sent me home with the bellhousing.  They installed the pedal shaft on the bell housing and replaced/installed lower bushings plus installed new bushings in pedals.

.   IMG_1804

The block is now finished and honed.  Please note the crosshatching on the hone.

IMG_1817 IMG_1818

Here are some images of the pistons once they were made ready for the rebuild.  Apparently the heaviest was 2.2 grams off from the lightest.  They are now all within .2 grams of weight.

IMG_1864 IMG_1865 IMG_1866

You remember that dirty flywheel…. Here is the a before and after of it.

IMG_1765 IMG_1766

….. and in case you didn’t see it already posted on Fordbarn.com, here is a tour the Mike gave of the J&M Shop.

I’ve also decided, since spring is around the corner, that I would have J&M’s contacts rebuild the starter and the carburetor. I really wanted to do these things myself, but there are only so many hours in a day and I want to get the car back on the road this Spring.  If timing allows this Month (March), I will be taking apart and restoring the transmission with John Karal (the “North Jersey Model A Guru”).

As I sort through all the options being presented to me regarding my engine’s rebuild as well as the plethora of mutually exclusive recommendations from multiple folks “in the know” (all good suggestions and from well intending folks who know better than I), the Gulbankians haven’t stopped their rebuild process. The parts are cleaned and inspected and the nine cracks have been stitched. Prior to this process, I thought the stitching required some welding. Apparently this isn’t the case. It is a cold process that seems more mechanical than metallurgy.

These are the pins (locks?  screws?  whatever!) used for the job.

IMG_3392

How do these pins become stitching? Apparently the metal stitching process is one where multiple holes are drilled into the cast iron and then a collection of screws (locks) are put in place then more holes are drilled into both the iron and the screws and then more screws are added.  All the screws are are overlapped and engineered in a way to pull together the cast iron.  Let me try to explain in a more visual manner.  Imagine that these series of letters Os are the screws put in place “O O O O O O” .  Now add a second set of “O”s that fill the spaces in between the “O”s and also overlap each of the first “O”s by just a little This creates a line (stitch) of materials pulling the sides together.

Here is what the results look like.

IMG_1744 IMG_1743 IMG_1748 IMG_1747 IMG_1746 IMG_1745 IMG_1749 IMG_1751

The following is a video from a third party (Lock-N-Stitch), showing the process. The stitching method seems similar to how secant pile walls are constructed in civil and structural engineering. Here is Lock-N-Stitch’s tutorial.

With J&M going at it full speed, I also need to make some quick decisions and start getting ready for putting the engine back in the car.  This is much more work than just putting it back in. While the engine is out, it sounds like I “need” to:

1) Rebuild the transmission
2) Replace the throwout bearing
3) Rebuild the starter
4) Replace the motor mount (or at a minimum checking them for cracks and remaining useful life)
5) Replace the intake/exhaust manifold
6) Rebuild the carburetor
7) Rebuild the distributor
8) Install a thermostat

I am arranging for some people “in the know” to stop by my place and look over the car to see if there are any other more immediate repairs that should be addressed with the engine out. Let’s not forget, I have no real idea what I am doing.  I am assuming there are several repairs related to steering, suspension, etc. This is where I can see repairs further snowballing. While I understand the logic of “while you are doing X it you really should do Y”, this logic doesn’t have an end point until a full frame off restoration is done.  I am NOT doing a frame off restoration at this point.  I want to do the “life safety items”. The car took 86 years to get to its present condition. I want to take my time bringing it back. This said, my desire to “be hands on” with each stage of the restoration is becoming increasingly impossible. There aren’t enough hours in the day.  With unlimited time, I could do things paced, but if I want to have the car back on the road this Spring, I have to send out some parts to respective part gurus… which isn’t something I was intending to do.

More to follow……………

Crack is Whack!

Posted: February 19, 2015 in Uncategorized

The G-Boys are at it again… in fact, I don’t know if they stopped.  Since dropping off the engine this weekend, J&M have been emailing me progress photos at least once a day.

The studs are out (not a reference to the G-Boys but a reference to the bolts in the engine — come on readers…. these puns do come with limits).  None of the studs broke.  The G-Boys found yet another stray Bendix screw in the flywheel housing.  I guess the starter will be rebuilt too — I haven’t decided if I will take that on myself or send it out. All engine parts are now oven cleaned and have been subjected to magnafluxing and a meticulous inspection.  I now suspect the G-Boys are actually in the drug enforcement industry, as they are proving themselves experts in finding crack.  I suggest you try to imagine them chasing eachother around the shop yelling “Crack is Whack” in their New England accents.

The block has three small cracks.  Here are images of the crack at the burnt valve and on the oil return.  I am told that these are “standard” types of cracks and will be “easy” to fix.

IMG_1694IMG_1693

The head has two small cracks.  They are between the distributor hole and the water jacket.  I am told these are “standard” types of cracks and again easy to fix.  I am fairly certain this (in combination with the warped head) is where the oil was getting into my coolant. Here are two photos.

IMG_1714IMG_1715

The flywheel housing has two cracks on either side and the side cover has a crack as well.  I’ve got to ask them how/why the cracks occur at this place.  One would imagine that this housing isn’t subject to much change in heat… perhaps it is stress due to vibration at this point of contact.  I’ll ask.  <<JG tells me that, “The cracks on the flywheel housing are due to a lack of support . The wishbone of the front axle pushes against that portion of the housing via bell housing. If you hit a bump hard enough (”pothole”) then the stress is transmitted to the unsupported area of the flywheel ” he also states that “Ford rectified this in 1931”>>

Here are some photos of the flywheel housing.

IMG_1690IMG_1691IMG_1692

Fortunately the crankshaft was in good shape with no cracks and will be reground. This is the crank on a larger magnet, allowing for the mangafluxing to occur more efficiently than if the G-Boys had to use the single horse shoe.  This device allows them to hose the crank down and inspect.

IMG_1702 IMG_1703

That makes 9 cracks in total. I am assured that these are all very common cracks and most likely have been there for years. This said, my overheating the engine prior to installing the Bergs HD touring radiator and my driving while knowing that I had a burnt valve likely didn’t help the cause either.  Still, i got a few years out of it and apparently could have pressed my luck for a little longer if I just left things alone.

The G-Boys have also machined out the valve seats and installed hardened seats ones in all but the one spot that needs to have the metal stitching.

IMG_1705IMG_1706IMG_1707IMG_1711IMG_1710

If I am following the process correctly, the “next steps” include crack repair via metal stitching.  We are also discussing some of the “options and improvements” that folks keep suggesting (like adding a counterweight to the crank).  More to follow as I have more to share…..

The Gulbankian Brothers

Posted: February 17, 2015 in Uncategorized

John and Mike look like they could be a WWF tag team complete with pro-wrestler stature.  These brothers appear as two barrel chested pitt bulls ready to take on any challenge.  John once told me “on a good day I used to lift a short block into a car myself”.  If you see him you would believe it.  Thankfully, most pitt bulls are friendly.  Once you meet John and Mike, you realize that they can not only play catch with a short block, but they are soft-spoke, humble, and good natured (almost shy).  They also have a ridiculously encyclopedic knowledge of Model A engines and LOVE what they do.  These are two of the big-shot-industry-pros when it comes to the engines.  They are masters of an art and they don’t bother trying to impress anyone…. because they don’t have to try.

It is impressive watching skilled professionals do their thing.  If you have ever watched foodnetwork, you’ve seen the ease at which their celebrity chefs prep and cook a meal.  John and Mike no longer were wrestlers… they were now a master chefs butchering a piece of meat and prepping a meal.  John and Mike sliced and diced.  As they were doing so, they were spouting out dates and back-history on parts and the reasoning why certain parts were modified by Ford over the years and what/how the modifications were.  In this regard, perhaps they were more like archaeologists than chefs… either way, still impressive.

John At Work Photo Feb 14, 12 31 59 PM Photo Feb 14, 12 33 35 PMPhoto Feb 14, 12 32 22 PMPhoto Feb 14, 12 59 40 PMPhoto Feb 14, 12 52 17 PMPhoto Feb 14, 12 35 08 PM Photo Feb 14, 12 39 23 PM Photo Feb 14, 12 54 07 PM Photo Feb 14, 12 59 44 PMPhoto Feb 14, 1 04 07 PM

Mangnaflux Video:

Steel Cap Old School

Original Pistons/Rods and Caps Turned Magnet

Why should you go with poured Babbitts (as opposed to inserts)

So what do we know now that the engine is in pieces?.  As Al Clarke (of Go Devil Garage in NY) had previously noted, the engine looked like most of it was un-restored (and yes, I have given GDG a plug…. Al seems like a solid guy and I remain appreciative of his help in October).  With John and Mike’s teardown complete, we could see:

  • The majority of the engine appeared to be untouched since it left the factory floor. The pistons, rods, lifters, valves, clutch, gaskets, etc all appear original.  The clutch is an original wagon wheel design — which I will likely make into wall art. The timing shaft was a replacement (but clearly stated “FORD”).
  • Most of the shims for the crank shaft were gone. The babbitts appeared original although most of them were worn, only one had a small missing piece.
  • There is a burnt-out valve and several more valves ready to go
  • Pistons, rings and chambers are well worn
  • The engine was running very rich and the carb may need a rebuild
  • The starter needs a partial rebuild
  • The distributor shaft is beaten up and the distributor should be rebuilt
  • The oil pump works but should be replaced (it is not the rebuildable type)
  • The engine has some cracks in the block, flywheel housing, and side cover. These are all “typical”.
  • The snow is starting to come down, Boston is still expecting a blizzard, and Gary and I still have a long drive to make.

Overall the Wrestling Team of Chef Galbunkian and Archaeologist Galbunkian (they can choose who is who) thought the engine was in better shape than they expected.  They warned me that more damage would likely be revealed upon the parts being cooked and cleaned but assured me that no major surprises were expected.

Over a two hour period the Gulbunkians tore apart the engine and generated two piles of parts.  All parts to be replaced I have in my “take home box”.  If anyone needs some spare parts (mostly nuts/bolts/guides/springs that are well past useful age), let me know before I have a local artist turn them into a “car part dog” for my desk.  After Mike and I did “some paperwork”, Gary and I left at 2:00 PM to head back to NY where we were heading to his folks place to dig out their car.

Since the 14th, John and Mike have emailed me several times with photos of the engine.  They have already commenced their work.  More to follow……